Guides
Part of Reading smartphone basics with a sceptical eye
Getting a new smartphone ready safely, one careful step at a time
New smartphone setup steps for safe transfer, account recovery, updates, permissions, backups, connectivity, privacy, and old-device handling.
What to take away
- Prepare account passwords, recovery methods, a backup, and carrier details before opening the setup flow.
- Transfer data while both phones are charged and connected to a trusted network.
- Install system updates before judging battery life, heat, or app behavior.
- Review permissions and security settings instead of accepting every default.
- Keep the old phone unchanged until calls, messages, photos, authentication, and backups work on the new one.
A careful setup prevents two common failures: losing information during the move and carrying weak settings onto a more capable device.
A typical setup and transfer takes 30 to 90 minutes, though large photo or message libraries can push it past a few hours. Plan that window so you do not start before travel, a work deadline, or an account login you cannot postpone.
The exact screens differ among Android phones, iPhones, carriers, and software releases. Treat the sequence below as a decision guide, then follow the instructions shown by your devices and service provider. If the underlying parts are unfamiliar, smartphone basics explains what the hardware, operating system, apps, and stored data each do.
Before you start
Gather the old phone, new phone, working chargers, and any transfer cable or adapter specified by the manufacturer. Connect the old phone to a trusted network and install any update required by the transfer tool.
Before You Start
- Old phone, new phone, working chargers
- Transfer cable or adapter
- Screen code for old phone
- Primary account password
- Recovery email or phone number
- Carrier PIN or transfer PIN
- Two-factor code access
Confirm that you know:
- the screen code for the old phone;
- the primary Apple, Google, or manufacturer account password;
- a working recovery email address or phone number;
- the carrier account PIN or transfer PIN, if required;
- how to access two-factor codes during the move; and
- whether a work or school administrator must enroll the device.
Make a fresh backup. Then inspect its date and contents. A toggle labeled "backup" does not prove that every photo, message, file, authenticator secret, or app record is recoverable. Building copies that survive a lost account or a failed device is covered in how to build a personal backup system.
Step 1: document the old phone
Take screenshots or notes of the home screen, important settings, paired accessories, installed apps, and any special accessibility controls. Record which apps contain data that does not synchronize. Banking, authentication, health, messaging, and work apps may require their own transfer or reactivation process.
For example, a banking app often asks you to sign in again and may tie its approval feature to the new phone. Google Authenticator or Microsoft Authenticator may need each account re-enrolled unless you exported or synced the secrets.
Do not erase or trade in the old device yet.
Step 2: establish service deliberately
Follow carrier and manufacturer directions for a physical SIM or eSIM. An eSIM is built into the phone and activated by downloading a carrier profile through settings, not by inserting a card; most phones released since 2018 support one.
Activate Service
- Follow carrier and manufacturer directions
- Insert physical SIM or download eSIM profile
- Do not force a stuck tray
- Confirm activation, compatibility, account, coverage
- Test outgoing call, incoming call, text, data
- Label dual SIM lines and set defaults
Do not force a tray that does not move freely. If the new phone reports no service, confirm activation status, carrier compatibility, account standing, and local coverage before repeatedly resetting network settings.
Test an outgoing call, an incoming call, a text message, and mobile data with Wi-Fi turned off. If the phone uses dual SIMs, label each line and choose defaults for calls, messages, and data.
Step 3: choose a trusted setup connection
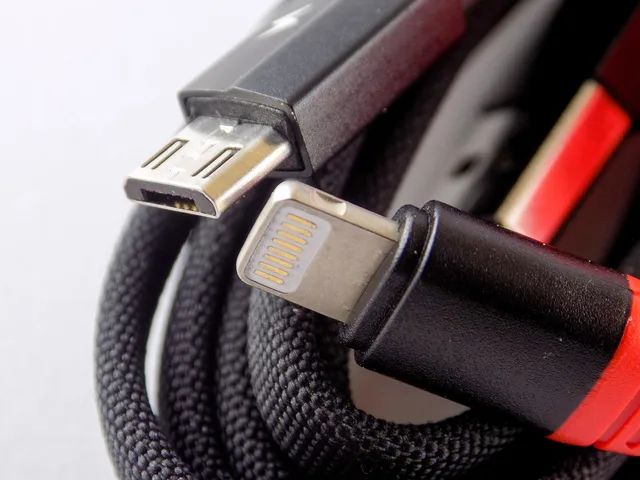
Use a private Wi-Fi network you control when possible. Avoid an open public hotspot for account setup. A wired transfer can be faster, but the cable must support data rather than charging alone. What each cable and radio actually carries is set out in how the phone's connections differ.
During setup, read prompts that ask whether to restore a backup, copy directly from the old phone, or begin fresh. A fresh setup can reduce inherited clutter, but it requires more manual work. A transfer is convenient, though some settings and local app data may still be omitted.
Apple's Move to iOS app moves data from an Android phone to an iPhone. Google's Android Switch app or Samsung Smart Switch moves data to many Android phones, including Galaxy devices. For a direct cable transfer, use the cable or adapter your manufacturer specifies, such as a USB-C to Lightning cable or Apple's Lightning to USB-C adapter.
Step 4: secure the account and lock screen
Create a screen code that is difficult to guess. Avoid birthdays, repeated digits, and simple patterns. Add a fingerprint or face sign-in only after the code works, because the code remains the fallback credential.
Confirm the account recovery address and phone number. Store recovery codes in a place you can reach without the new phone. Which second factor to keep and which to retire is weighed in passwords, passkeys, and MFA compared. If the device offers theft protection, lost-device location, activation locking, or remote erasure, turn it on and learn its limits.
Step 5: update before customizing
Install operating system, security, carrier, and app updates. Restart when directed. A newly manufactured phone may ship with months of pending changes, and setup activity can make it warm or drain the battery temporarily.
The Cybersecurity and Infrastructure Security Agency's mobile-device checklist for consumers recommends automatic updates, strong authentication, trusted app sources, limited app permissions, care with public Wi-Fi, trusted chargers, and preparation for loss or remote wiping. Use that list as a security review, not as a substitute for model-specific instructions.
For an iPhone, check Apple's support page for your iOS version and the Privacy and Security settings. For a Pixel or other Android phone, check Google's support page for your Android version and the Security settings.
Step 6: transfer in categories
Check one category at a time.
Transfer Categories
- Contactsrecent people, labels, duplicates
- Photos and videosrecent items, albums, edits, originals
- Messagesrecent conversations and media attachments
- Filesdownloads, scans, voice notes, offline documents
- Appssign-in, local records, subscriptions, notifications
- Authenticationeach account works before removing old method
- Health and wearablehistory, pairing, permissions
- Work dataenrollment, certificates, VPN, policy compliance
- Photosopen older and newer albums, favorites, and camera roll items offline.
- Messagescheck SMS, MMS, and any RCS or iMessage history where the platform allows.
- Contactsconfirm names, numbers, email addresses, and groups.
- Filesopen documents, downloads, and cloud-synced folders.
- Healthcheck step counts, workouts, and medical ID if you use it.
- Authenticator secretsopen each authenticator app and confirm codes generate; many apps do not move secrets automatically.
- App datasign in to a few apps and confirm saved drafts, game progress, or settings.
Do not assume a thumbnail proves that the full file is stored locally. Open a few older and newer items while disconnected from the old phone.
Step 7: review privacy and attention settings
Open the permission manager and examine camera, microphone, contacts, photos, nearby devices, and precise location access. Choose the narrowest permission that allows the app to do its job. Remove permissions from apps you do not trust or use.
Then set notification preferences. Disable promotional alerts and keep security, calendar, communication, health, and emergency notices that matter. Adjust lock-screen previews if sensitive message content should not be visible to anyone holding the phone. Once setup is finished, the recurring form of these reviews is the smartphone upkeep and security checklist.
Step 8: create a recovery test
Run a new backup and confirm its timestamp. Sign in to the lost-device service from another device without completing any destructive command. Verify that emergency contacts, medical information, and account-recovery methods are correct.
Keep the old phone for several days if your return or trade-in window permits. Once every important service works, follow the manufacturer's reset process and remove the old device from relevant accounts. Photograph its condition and serial information before shipping a trade-in.
Setup completion checklist
- Calls, texts, mobile data, and voicemail work.
- Wi-Fi and essential Bluetooth accessories connect.
- System and apps are current.
- Backup completed after the transfer.
- Account recovery works without relying only on the new phone.
- Banking and authentication apps are tested.
- Photos, messages, files, contacts, and health data are checked.
- Permissions and notification previews are reviewed.
- Lost-device controls are enabled and understood.
- The old phone remains intact until verification is complete.
Common questions
Should I insert the SIM before setup?
Follow the phone and carrier instructions. Some transfers work before activation, while some carrier and messaging steps are easier after the line is active.
Is direct transfer safer than cloud restore?
Neither is always safer. Security depends on the accounts, network, cable, device state, encryption, and verification. Use the supported method and keep a separate recent backup.
Why is the new phone hot during setup?
It may be downloading, indexing, restoring, updating, and processing photos at once. Let it finish on a hard, ventilated surface. Seek support if severe heat, warnings, swelling, odor, or shutdowns continue.
When can I erase the old phone?
Only after you have tested service, important data, authentication, backups, and account recovery on the new device.